Page History
You can also authenticate using a certificate. Here's a tutorial on how to create a certificate for an Atlas database.
1. Create the
...
certificate.
1.1 Create the Certificate Authority
...
A popup will appear, no modification is needed, click OK.
1.2 Add the Certificate Authority to Atlas
...
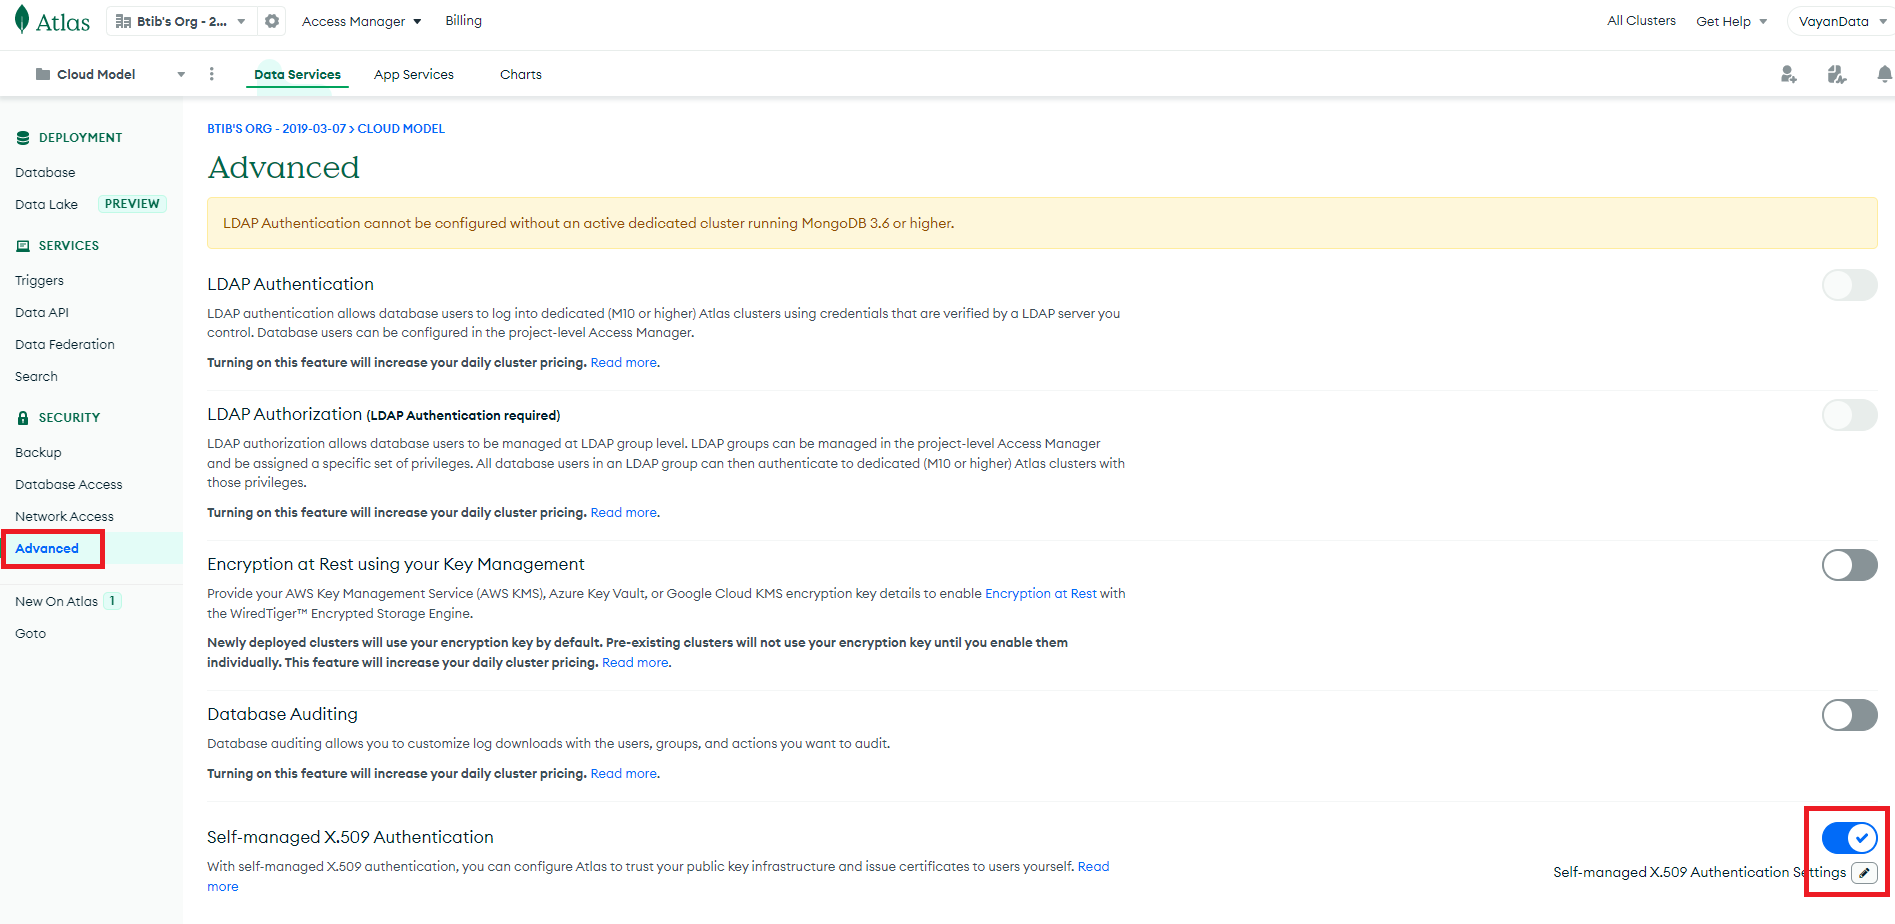
In the Atlas UI, select your Project in the left side Panel, select Advanced in the Security section.
Enable the Selfthe Self-managed X.509 Authentication, edit the settings (click on the pencil button), upload your Certificate Authority and save.
1.3 Create the
...
Client Certificate
In the same way as in the 1.1 step, create a new certificate, but this time, select "Client" as the Certificate Usage.
...
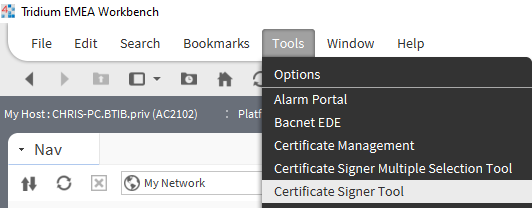
In the Workbench, select the Tools tab and select the "Certificate Signer Tool"
S
...
In the popup, select your newly created .csr file, select the CA alias created in step 1.1 with the password you used, and click OK.
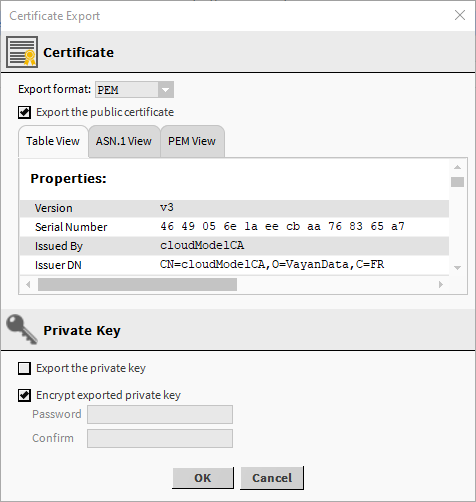
In the User Key Store, your certificate should now have a green shield ![]() .
.
Export this certificate but this time, with the private key. And import it in the User Key Store in your Station (Services > PlatformServices > CertManagerService).
1.4 Create a Mongo User
Go back in the Atlas UI, in your project and select the Database Access. And add a new User.
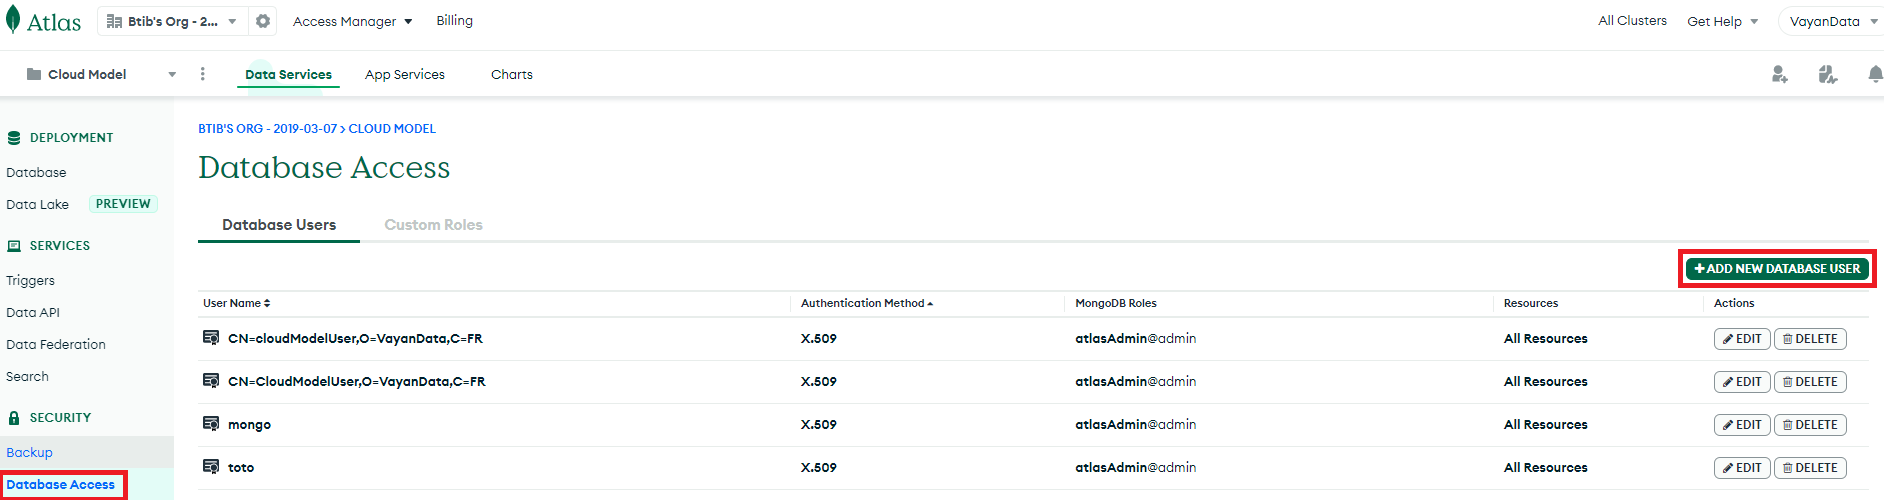
In the popup, select Certificate, and add the common name.
The common name must be the RFC2253 formatted subject from the client certificate. Here is a command line to obtain it (you might need to install openssl) :
openssl x509 -in <pathToClientPEM> -inform PEM -subject -nameopt RFC2253
Select a role and add the user.
2. Setup the connector
2.1 Put the Connection String
When a certificate is used to authenticate, the connection string is a bit different from the username+password one. It should look like this:
mongodb+srv://<hostname>/?authSource=%24external&authMechanism=MONGODB-X509&retryWrites=true&w=majority&tls=true
(the main difference is the presence of the authsource, and the authMechanism).
Fill this ConnectionString with your hostname and add it to your connector in the connectionString slot and fill the databaseName slot.
2.2 Put the Certificate
Drag and drop a ClientCertificateAuthentication from the palette (in the Authentication folder) in the AuthenticationSchemes component in your connector and select your certificateAlias.
Enable the Connector and it should successfully connect to your database.