Important notice: Microsoft Office 365 and Microsoft Azure are very large platforms. There is not a single configuration possibility. The following tutorial is only an example in a specific environment. If you don't know Microsoft 365 and Azure eco-systems, we strongly advise you to require someone's expertise.
We are going to see how to create a such an interface with full interaction with Azure Office 365
-
Retrieve bookings of the day
-
Create bookings on the fly (from an interface for example)
-
Cancel a booking to free the room (when there is no one inside for example)
What do you need?
There are a couple of requirements needed in order to create this interaction:
-
A RestNetwork (better if it's licensed...) installed on Niagara from 4.6
-
An Office 365 account https://www.office.com/ of your organization (or your customer organization)
-
An Azure account (it's easier if it's the same one as Office 365)
We are going to use the Microsoft Graph API: https://docs.microsoft.com/en-us/graph/outlook-calendar-concept-overview which is the most recent and easiest to connect to Office 365.
Register your app on Azure
We will follow this tutorial to register the application: https://docs.microsoft.com/en-us/azure/active-directory/develop/quickstart-register-app
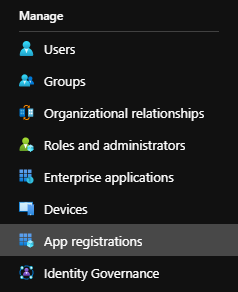
Search for and select Azure Active Directory. On the Active Directory page, select App registrations and then select New registration.
Give a name to the instance and give a redirect url (localhost is fine).
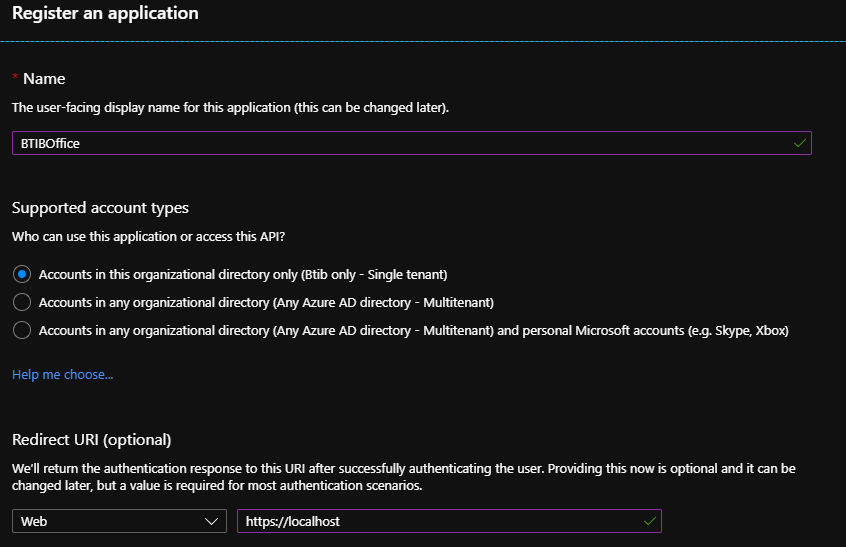
Click on Register at the bottom.
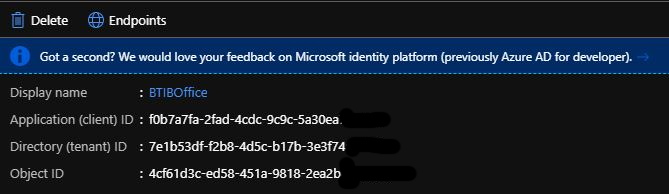
Note the Application (client) ID and Directory (tenant) ID somewhere, we will need later
Add credentials to the application
From the same Azure application, go to Certificates & secrets
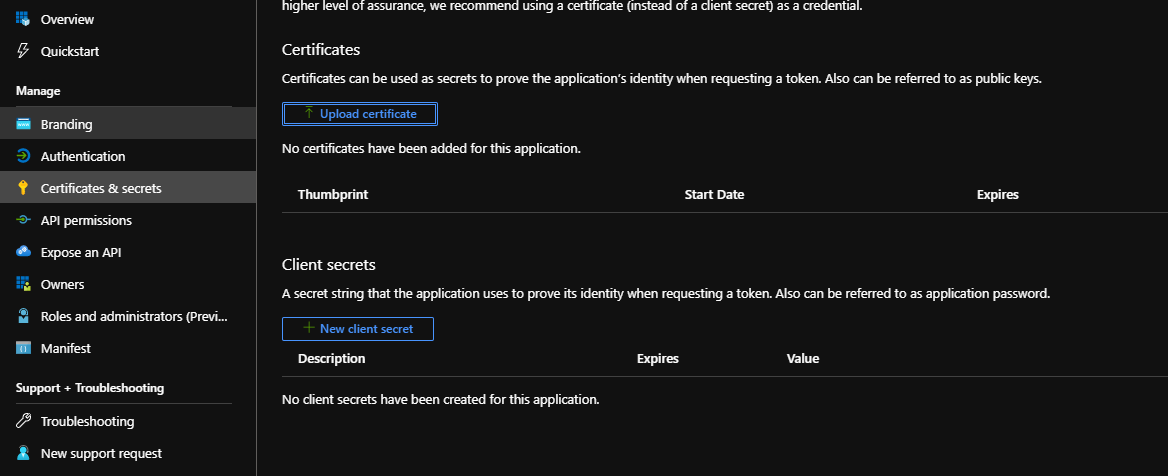
Select New client secret and give a name to your client secret. Then select Add
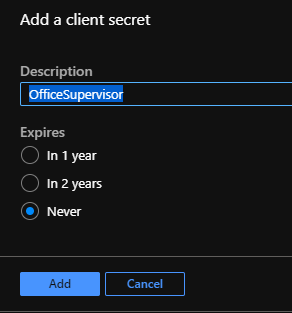
Copy somewhere safe your client's secret value, we will need it after. You won't be able to see it again from the Azure interface. If you lose it, no worries. Just delete the existing one and create a new one (it will impact every application that used it)

Add permissions to the application
Now from the same Azure application, go to API permissions
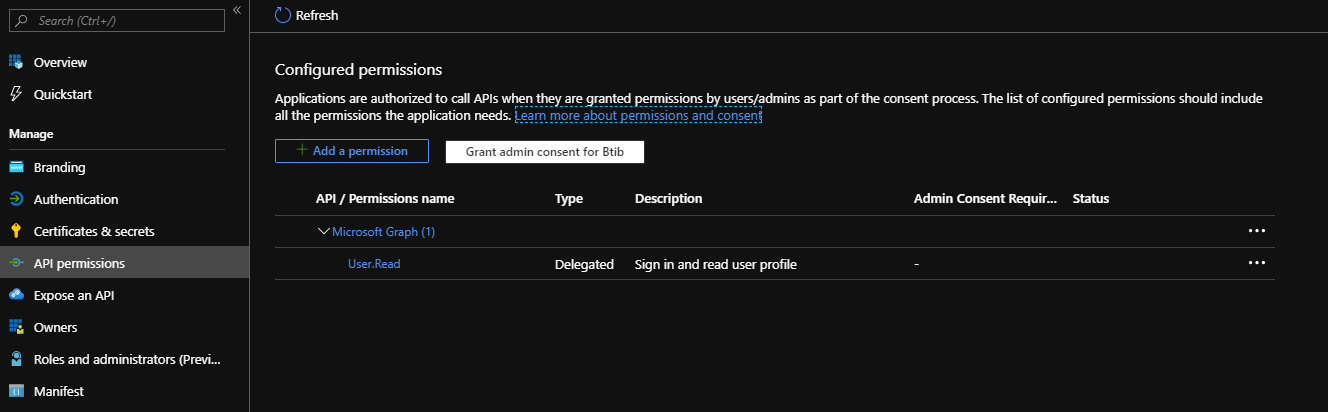
Select Add a permission, a panel will open on the right. Select Microsoft Graph and then select Application permissions
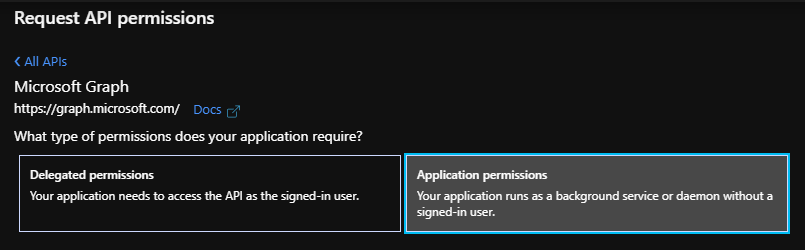
Browse the permissions and locate Calendars. Select Calendars.ReadWrite

Configure the RestNetwork
In Niagara, open the RestNetwork palette and then the Examples folder.
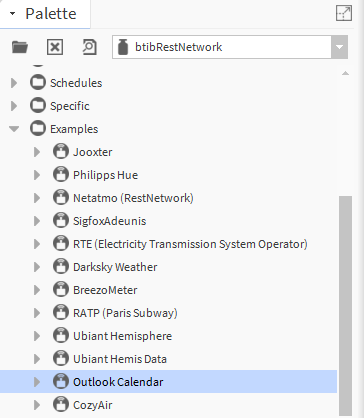
Add the Outlook Calendars examples to your drivers. Open it. Open the Auth device, open inside the http config
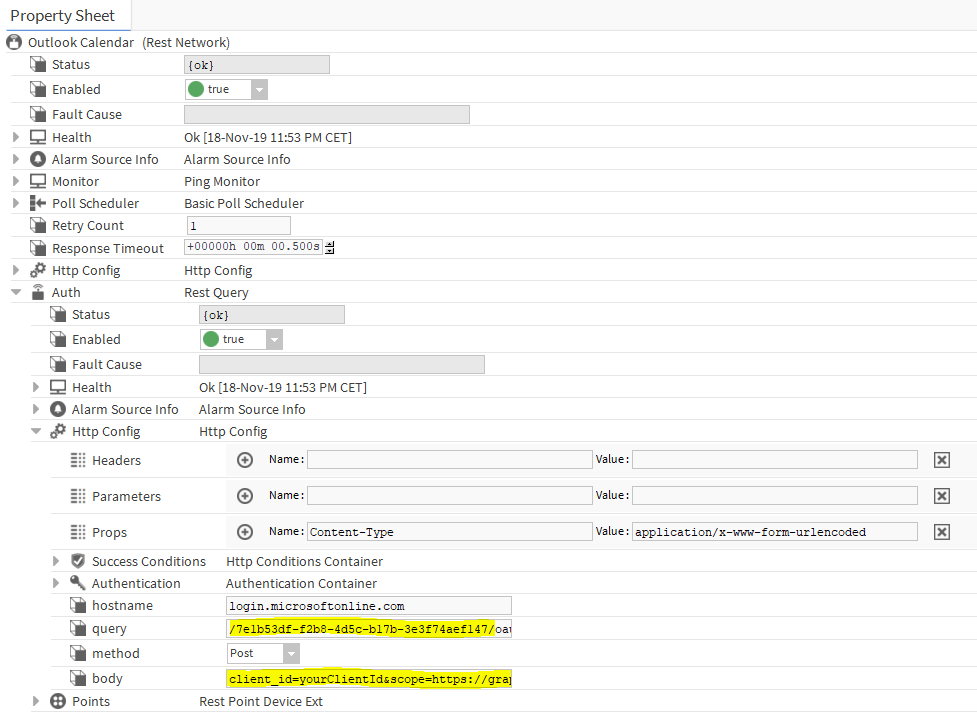
There are three parameters to change from the example:
-
The tenant id in the query.
-
The client_id
-
The client_secret
Example for the query: /7e1b53df-f2b8-4av5c-b17b-3e3faz455f147/oauth2/v2.0/token
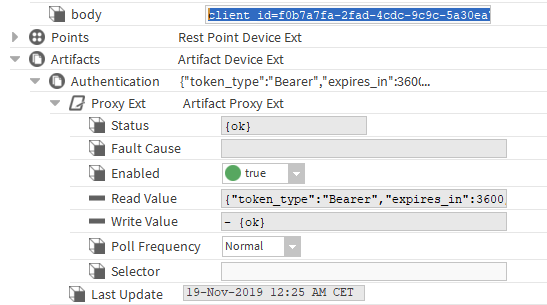
Example for the body: client_id=f0b7a7fa-2fa-4cdc-sc9c-5a345a72c144&scope=https://graph.microsoft.com/.default&client_secret=QbvpFC=hVF.slgHaifEs]FzddF31@f854&grant_type=client_credentials
Once you've changed the values. Trigger the ping action on the Auth device. Then Open the Artifacts below, you should get your token in the read value
The authentication is now configured!
Manage the permissions
You need now to give your consent to allow access to the different calendars. Change the URL below with your own client_id
Then copy-paste it to your Web browser and select Accept

Create a meeting room
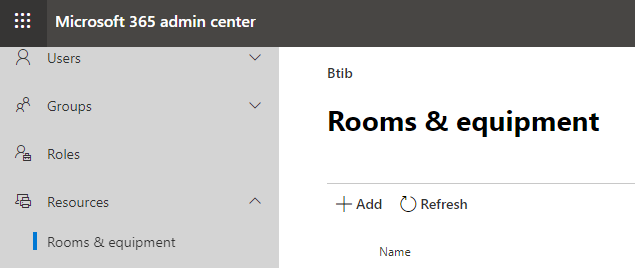
Go to the Office 365 interface and open the Admin center panel. Locate Show All > Resources > Rooms & equipment
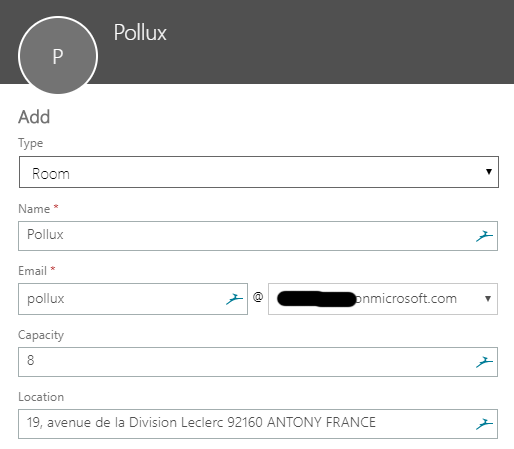
Select Add. And configure a room. Make sure to use the proper domain for the email.
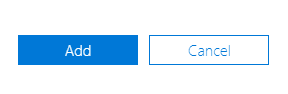
Select Add (no need to give a premium account for a meeting room)
Then in the Delegates block below, select Show all
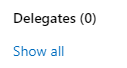
Add everyone that needs to book the room. Then click on save.
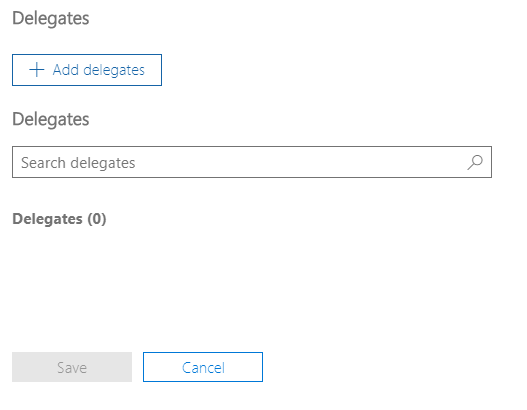
The Delegate's configuration is optional. It will actually allow people registered as a "delegate" to book the room directly in the room calendar. You actually have two options to create an event.
-
Option 1: You create an event in your own calendar and choose the meeting room as a location
-
Option 2: You create an event in the room calendar.
The first option sounds better, however, the Microsoft API won't allow you to retrieve the name of the booking and it will replace it with your name. For now, we don't know yet if this is a bug of the Microsoft Graph API or an intended limitation. So if you need to visualize the event name, the second option is better. The delegate configuration is necessary only for the second option.
Configuration of the schedule in Niagara
In Niagara,
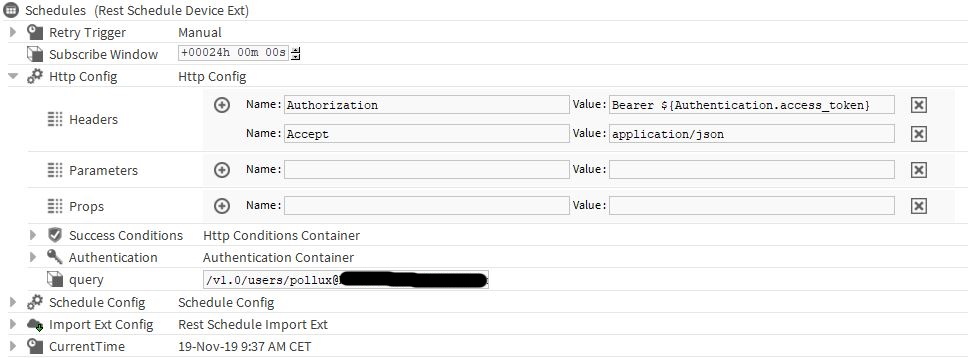
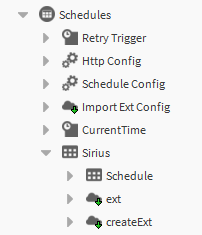
Open the Calendars device > Schedules > HttpConfig
Right-click in Http Config and in the Actions section click Add Overriding Property, then choose query.
Change the query with the room email address (it's the query used to discover calendars in the manager)
Example: /beta/users/pollux@mydomain.onmicrosoft.com/findRooms (use beta instead of v1.0)
Then Open Import Ext Config
Change the query with the room email address (it's the query that will be used once you create the new calendar)
Example: /beta/users/pollux@mydomain.onmicrosoft.com/calendars/${id}/events (use beta instead of v1.0)

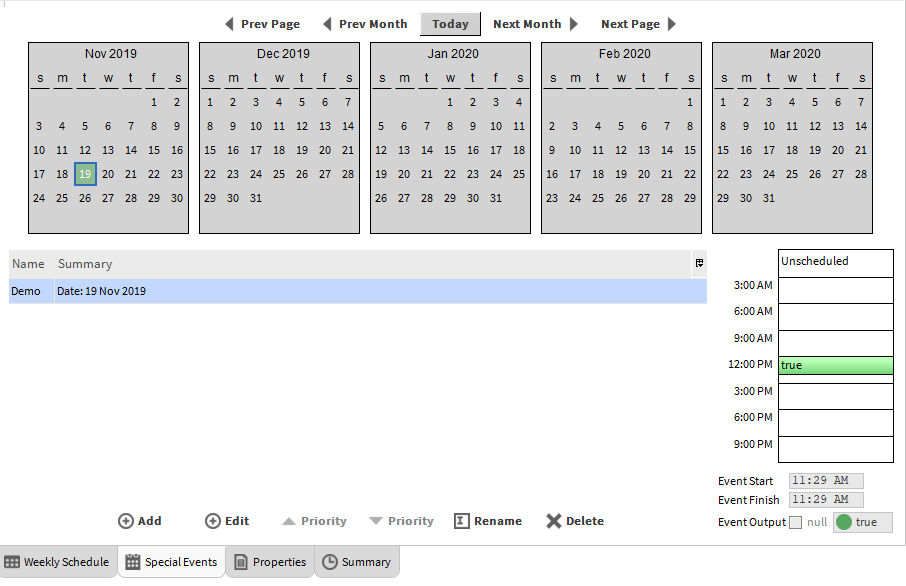
Then go to Schedules (In the Calendars device) to open the schedule manager. Click on Discover in the manager. A calendar should appear. Add it to the Database and give it a name.
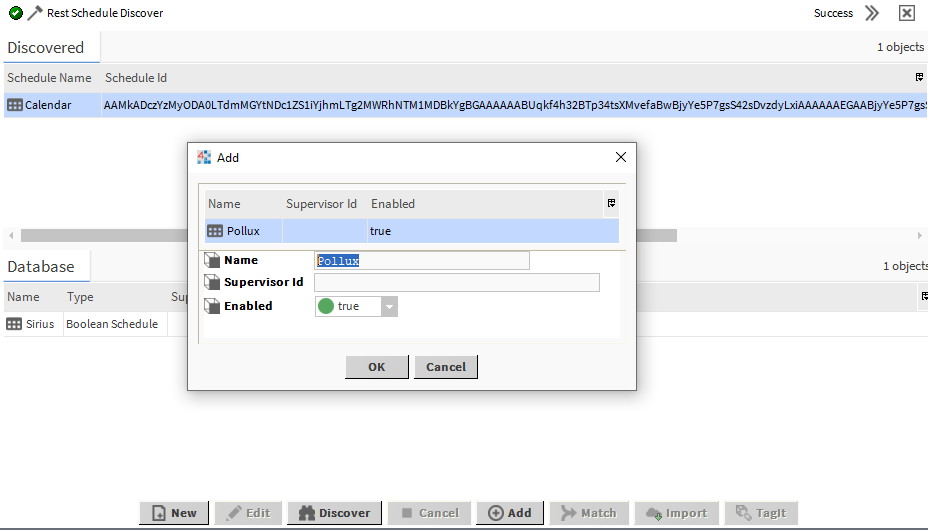
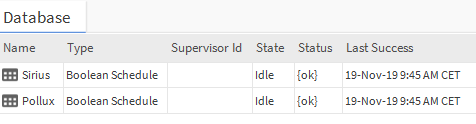
Its status should be ok
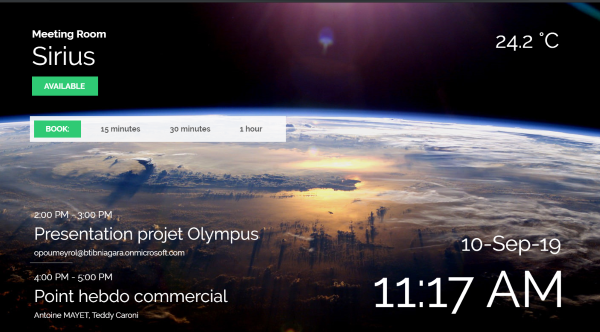
Now go to your Outlook application (mobile app, Web app, or desktop app) and create a new booking.
Note: Rooms may take some time to appear in the Web app.
You will get the booking in the Niagara schedule
Create a new event on the fly from Niagara
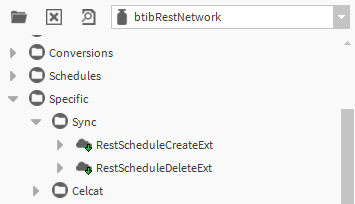
We only retrieved bookings so far. You can also use the RestNetwork to create bookings in Outlook (from Niagara)
You can drag&drop from the palette a RestScheduleCreateExt or use the provided example with the Sirius room.
You have to fill two fields to create bookings:
-
The query with the room email address. Example: /v1.0/users/pollux@yourdomain.onmicrosoft.com/calendars/${ext.scheduleId}/events
-
The body with the information you want to use (the subject, the start date...). Example:
{"subject":"Improvised Meeting 18:48:58","body":{"contentType":"HTML","content":"Réunion de la SBA"},"start":{"dateTime":"2019-09-17T18:48:58","timeZone":"Romance Standard Time"},"end":{"dateTime":"2019-09-17T19:18:58","timeZone":"Romance Standard Time"},"location":{"displayName":"Paris"},"attendees":[{"emailAddress":{"address":"smith@acme.com","name":"Mr Smith"}}]}
You can fill this information in the Logic folder
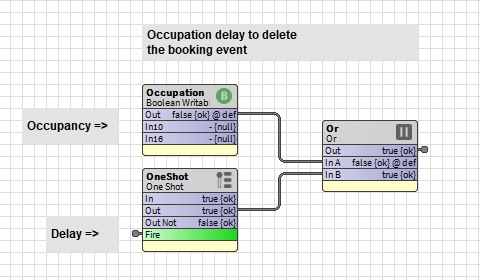
Delete the current event from Niagara
You can also delete an existing event if it matches some criteria. You will find an example in the Logic folder of the Sirius schedule example using the occupancy and a OneShot.
You have to modify as well, the query with your email address.