
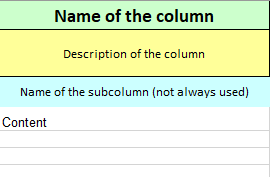
A Data Sheet is composed of specific columns. Each column has a name (first row) and a description (second row, you can actually put any description you want).
For all columns except the dynamic ones, the name is a keyword which is used to determine the column’s function. Some columns may have one or more SubColumns (third row).
Some columns are:
-
Dynamic: column reflection defined by the associated SubColumn, the name doesn’t matter, all the information is in the SubColumn.
-
Mandatory: the data in the cell is needed to target the component in the row. Without it, the row is ignored.
-
Multiple: the column can have several SubColumns.
-
Simple: the column has no SubColumns.
-
Unique: there can be only one column with this name. If there are more than one, only the first one will be taken into account.
-
SubComponent: multiple columns associated to a subComponent. They can accept dynamic SubColumns.
Example:
|
Name |
Display Name |
Tags |
Address |
subcomponent:$ModbusAsyncDevice |
|||
|
Name of the instance to create |
Display Name of the instance to create |
Define the tag key in the column header or in the cells separated with ; |
See Help sheet to get the syntaxes |
Name of the Sub component to create |
|||
|
|
|
markers |
address1 |
address2 |
address3 |
name |
info:{%enabled%} |
The Name and Display Name columns don’t have any information in the third row, they’re simple columns.
The Address column has three values in the third row (three SubColumns), the Tags column has one value, but can have other subColumns depending on the needs.
The subcomponent column, as its name implies is a SubComponent Column, it can accepts dynamic SubColumns.
Each line under this header will be associated to a component.
At the export the components will be sorted in the alphabetical order on the slotPaths.
We will now describe each main column.
Be careful with the order of columns, this may be important because columns are evaluated from left to right.
Thus, you can reuse something defined in a column only in following columns on the right.
Internal Id column
Accepted values
-
Id (String beginning with
#)
Description
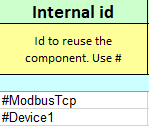
The goal of this column is to reference a component (the one defined on the current line) to reuse it later as a base or to add relations, links or inheritances to it from other rows. An Id must begin with the # character and must be unique in the whole excel file (you can’t have two identical ids even in different sheets).
Example:
#myId
You can call for an id from another sheet.
The value is not mandatory, but the column is mandatory in a Data Sheet. Without this column, the sheet won’t be considered as a Data Sheet.
Import
-
Before the operation, all the ids are checked. No duplicates are allowed and each id must correspond to a valid slot path.
-
The ids are not saved on station side.
-
If some ids are duplicated, the system will stop the import and warn you.
Export
-
Each row will have a generated id using it’s display name or the SFormat taken in the structure sheet. If two components have the same display name, the system adds a number between brackets to differentiate them.
Example:
#displayNameand#displayName (1)
Base column
Accepted values (by priority during the export)
-
Id
-
Variable
-
Absolute slot path
-
A mix of an id with a sub-path
Description
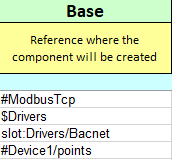
The parent in which the component is located or where it will be created.
-
The variable value must be an absolute slot path.
-
You can create a slot path by using an id or variable prefix.
Example: You have a
$Drivers=slot:/Driversvariable, and amyNetworkinside the Drivers folder. You can access this network by setting the cell value to$Drivers/myNetwork
Template column
Accepted values (by priority during the export)
-
Variable
-
Path to a bog or a component inside a bog
-
Path to a Niagara Template
-
A Niagara TypeSpec
Description
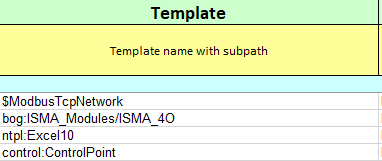
If you want to create a new component, the system needs to know what to create. This is the purpose of this column. This is not mandatory if you want just to set value of an existing component.
The variable must be associated to a path or a TypeSpec.
Example: if
$MyVar = myFolder/mybog/myComponent, you can directly put the variable instead of the whole path.
If the component already exists, you cannot change its type through the template.
Niagara TypeSpec
The simplest syntax is the TypeSpec. Just put the desired TypeSpec and a component of this TypeSpec will be created.
Example:
control:ControlPoint
Bog file in the shared user home
To use a bog file located in the Niagara’s shared user home, you should add a bog: prefix. It is not mandatory, but for a better understanding and a more uniform template column, we advise you to use it.
The path to a bog starts from the shared/excel/templates folder in the user home.
Example:
C:/Users/xxx/Niagara4.14/tridium/shared/excel/templates
You have to remove the .bog extension in the cell value.
Example: You have a
mybog.bogfile inside amyFolderfolder in the template folder. This file contains amyComponentcomponent which itself contains amySubComponentcomponent, you can accessmyComponentby setting the cell value tobog:myFolder/mybog/myComponentor you can accessmySubComponentby settingbog:myFolder/mybog/myComponent/mySubComponent.
You can also access the first component of a bog by directly setting the name of the bog.
Example:
bog:myFolder/mybogwill refer to themyComponentcomponent (if it's the first one in the bog file).
Bog file in the station home
To use a bog file located in the station shared folder, you have to add a stationBog: prefix. Unlike the bog: prefix, it is mandatory in this case.
The path to a bog starts from the shared folder in the station home.
Example:
C:/Users/xxx/Niagara4.14/tridium/station/myStation/shared
You can specify the targeted bog file name or the targeted component name just the same as a bog file in the shared user home.
Example:
stationBog:myFolder/myBog
Niagara template file
To use a Niagara template file, you have to add a ntpl: prefix. The path to a template starts from the templates folder in the user home.
Example:
C:/Users/xxx/Niagara4.14/tridium/templates
There is no need for the .ntpl in the cell value.
Example: You have a
myTemp.ntplfile inside amyFolderfolder in the templates folder. You can accessmyTemp.ntplby setting the cell value tontpl:myFolder/myTemp
Special use case for points, define a specific proxyExt for points
To simplify the creation of communicating control points, you can simply add a suffix to the template instead of creating a template and reusing it.
The format is the following:
-
pathToABog {proxyExtSlotName=DesiredTypeSpec}or -
TypeSpec {proxyExtSlotName=DesiredTypeSpec}
You can also put this value in a variable and reuse it
Example:
$MyModbusPoint = control:BooleanWritable{proxyExt=modbusCore:ModbusClientBooleanProxyExt}will create a BooleanWritable with a ModbusClientBooleanProxyExt instead of its standard NullProxyExt
BREAKING CHANGE: since version 46.13.1 you must put the suffix between curly braces: { }
You CANNOT put $MyVar {slot name=TypeSpec} in the template cell, the brackets and their content must be IN the variable value.
Example: if you have a variable
$MyVar= control:BooleanWritableand you put$MyVar{proxyExt=modbusCore:ModbusClientBooleanProxyExt}, the import won’t work
This suffix can only be used at the creation of the component, an existing component won’t be updated.
To add a new sub component in a NON EXISTING slot, use the subComponent column, this syntax can only be used to change already present slots.
Actions
There are two available actions that you can trigger in the template column:
-
Remove: simply add the
{remove}keyword in the cell, to delete the component. -
Replace: write the desired template, followed by the
{replace}keyword. The previous component will be deleted and a new one with the desired template will be created.
To use one of those actions the targeted component MUST exist.
Import
The template value is saved inside an “excelTemplate” slot in each imported component so it can export the template value. For an example, go to "Proxy extensions" in Step 3 Import your first Excel file
Export
If there is a value inside the “excelTemplate” slot, the value is exported.
If there is no value, it checks if the TypeSpec matches a variable. If it does match one, the cell value will be set to the variable. Otherwise, the cell will be left blank.
Name column
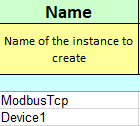
Accepted values
-
A name (just a string)
Description
Will set the name of a component.
Import
The read value will be escaped before using it.
If you change the name of an existing component into Excel, the system will create another component in the station since it doesn't record your change.
Export
The exported value will be unescaped.
DisplayName column
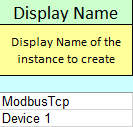
Accepted values
-
A display name
Description
Will set the display name of a component.
Export
If the value is the same as the unescaped name, the value won’t be exported.
Other columns
To learn how to use the other columns, see the different available features.