
Implementation
The source can be assigned to one or more of the model's Nodes for each aspect by using the AssignmentView.
To do this:
-
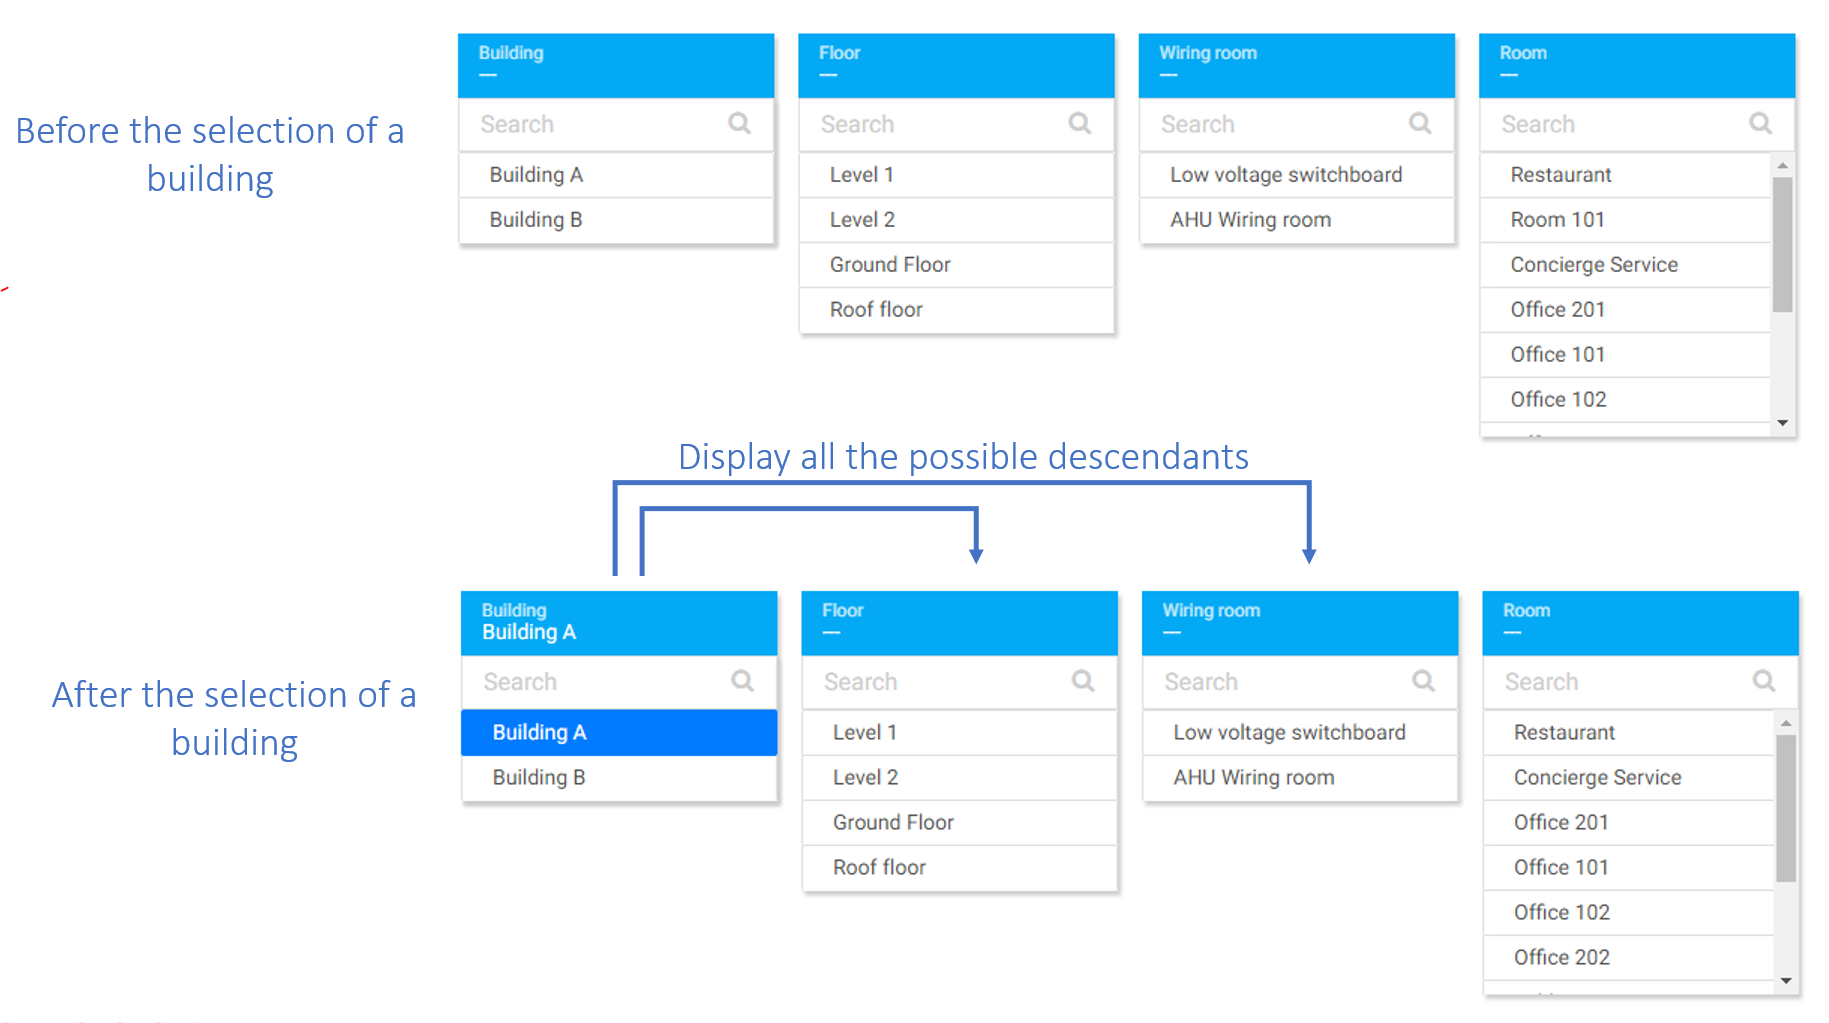
Click on any NodeDefinition of the aspect or on the name of the aspect to open the drop-down lists. These offer all the Nodes contained in each NodeDefinition.
-
Select a Node from the list. The lists will then be updated according to the relations between the Nodes and according to the Node selected in order to offer:The possible parents and children taking into account all selectionsThe siblings of the selected Nodes in order to be able to easily change the selectionTo validate a selection, it is necessary that the highest node is selected (level 0, the one in the leftmost list). See explanations below.Save the selection.
The AssignmentView follows a number of rules which are detailed below.
Assignment to the lowest node selected
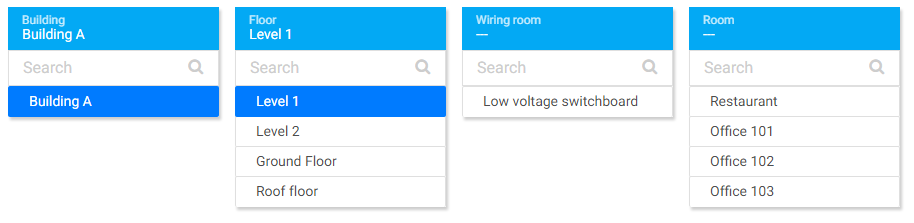
Rule #1: The assignment is made on the lowest Node selected.
In the example below, the source will be assigned to the Node "Level 1", not on the Nodes "Restaurant" or "Office 101" that have not been selected, and not on the Node "Building A" which has been selected. In order to optimize the relations created in the station, the source is assigned to the lowest node. The tools used behind allow information from ascending nodes to be retrieved automatically ("Building A" in our example).
Managing similar display names
Rule #2: Only one display name is shown in a list even if several Nodes are hidden behind it.
It is very common to use the same display names for several Nodes. If there are several buildings, a Node "Level 1" could be created for each building. However, the drop-down list of the NodeDefinition "Floor" displays "Level 1" just once even if there are several "Level 1" Nodes hidden behind it.
In our example below, "Level 1" exists in "Building A" and "Building B". The system did not select one of the buildings since both buildings are possible. It is necessary to define which "Level 1" it is.
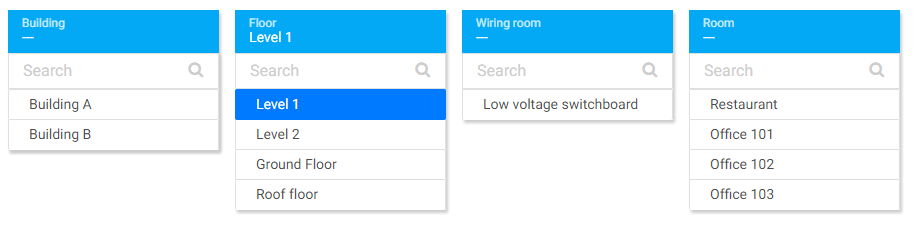
In fact the system makes a temporary selection of all Nodes whose display name is "Level 1". This selection is not valid until only one possibility exists (detailed below).
Need to select Nodes up to the highest level
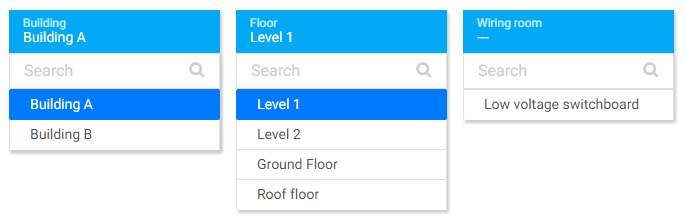
Rule #3: It is necessary to set the full path to the highest Node (the list of the leftmost NodeDefinition) to uniquely define all the selected Nodes.
Since it is forbidden to have the same display name between siblings when creating Nodes, selecting the highest Node guarantees a unique path.
Using the above example, it is necessary to select one of the buildings. It is forbidden in this example to have two buildings with the same display name. Floors may have the same display name but must belong to two different buildings.
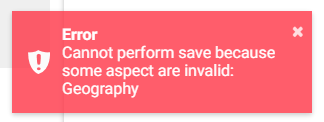
If the selection is not complete, i.e., the highest node has not been selected and there no unique path, an error message appears at the bottom right when saving, indicating the name of the invalid aspect(s).
Automatic list reduction
Rule # 4: Only the children possible for the selected Nodes are displayed.
The drop-down lists are automatically filtered to facilitate the selection of Nodes and to minimize the number of clicks to be made for Node assignation.
In the example below, when selecting Building A, only the Nodes contained in Building A are displayed. Some of the technical areas are therefore hidden. Note that if just building A remains selected, the assignment will be for building A (rule #1).
Displaying siblings
Rule #5: The siblings of the selected Nodes are displayed.
To facilitate the selection of another Node, the siblings of the selected Node are always displayed.
In the example below, "Building B" is a sibling of "Building A" since it is considered that the highest level Nodes are all siblings. All "Floors" siblings are also displayed, i.e. all floors of building A.
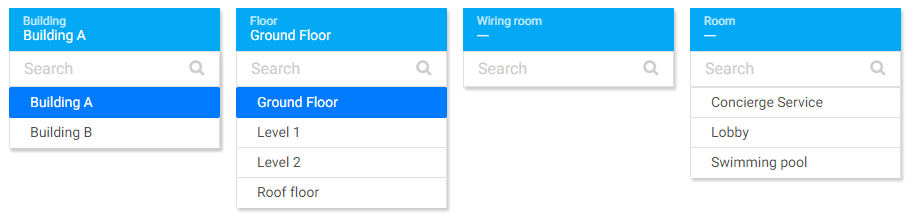
Note that it is the siblings of all Nodes hidden behind the selected display name that are displayed (Rule #2).