
Summary
The AlarmRecipient allows to send alarms to the remote Service.
Implementation
-
First you must setup a RealTimeConnector.
-
Drag and drop the AlarmRecipient from the palette in the AlarmService.
-
Fill the optional alarm data you want to add to the document which will represent each alarm record. Example: msgText, building, floor etc.
-
Give a name to the device (in your service) which will be dedicated to alarms in the destination field.
-
Select the connector.
-
In the AlarmService Wiresheet, create a link from the "alarm" slot in an AlarmClass to the "Route Alarm" slot in the AlarmRecipient.
-
You can also test the component by triggering the "Route Alarm" action
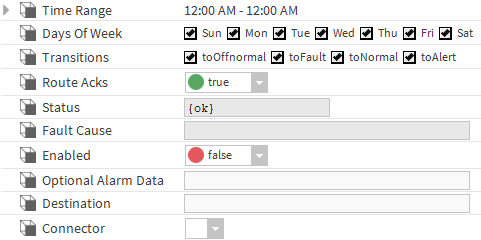
Properties
-
Status: Alarm recipient status.
-
Fault Cause: The error message field.
-
Enabled: Enable the alarm recipient.
-
Optional Alarm Data: Additional tag to be added to the message generated for each alarm (contained in the alarmData field in Niagara)
-
Destination: Name of the device dedicated to the alarms.
-
Connector: The associated connector.
Actions
-
Initialize: Initialize the connection with the service.
-
Disable: Disable the recipient.
-
Clean: Unregister the recipient.
Fault Causes
-
Connector Not Found: if there is no connector in the Btib Service > External Connectors > realtime Connector folder, try to add one.
-
Any other: Just clean and initialize.